参考地址
前言
iOS 更新了11.0之后对于view引入了safeArea的概念,那么到底什么是safeArea呢?
总结(我喜欢把总结放前面)
- 在适配 iPhone X 的时候首先是要理解 safeArea 是怎么回事。 盲目的 if iPhoneX{} 只会给之后的工作代码更多的麻烦。
- 如果只需要适配到 iOS9 之前的 storyboard 都只需要做一件事情。(勾选UseSafeAreaLayoutGuide)
-
Xcode9 用 IB 可以看得出来, safeArea 到处都是了。理解起来很简单。
就是系统对每个 View 都添加了safeArea,这个区域的大小,是否跟 view 的大小相同 是系统来决定的。在这个 View 上的布局只需要相对于 safeArea 就可以了。 每个View的safeArea都可以通过 iOS 11 新增的 API safeAreaInsets 或者 safeAreaLayoutGuide 获取。
- 对与 UIViewController 来说新增了 additionalSafeAreaInsets 这个属性, 用来管理有 tabbar 或者 navigation bar 的情况下额外的情况。
-
对于 UIScrollView, UITableView, UICollectionView 这三个控件来说, 系统以及做了大多数的事情。
1) scrollView 只需要设置contentInsetAdjustmentBehavior就可以很容易 的适配iPhoneX,
2) tableView 只需要在 cell header footer 等设置约束的时候相对于SafeArea
3) 对 collectionView 来说修改 sectionInsetReference 为 .safeArea 就可以做大多数的事情了。
总的来说, safeArea 可以看作是系统在所有的 view 上加了一个虚拟的 view, 这个虚拟的 view 的大小等都是跟 view 的位置等有关的(当然是在 iPhoneX上才有值) 以后在写代码的时候,自定义的控件都尽量针对 safeArea 这个虚拟的 view 进行布局。
一. 7.0~~11.0 之间的
iOS 7 之后苹果给 UIViewController 引入了 topLayoutGuide 和 bottomLayoutGuide 两个属性来描述不希望被透明的状态栏或者导航栏遮挡的最高位置 (status bar, navigation bar, toolbar, tab bar 等)。这个属性的值是一个 length 属性( topLayoutGuide.length)。 这个值可能由当前的 ViewController 或者 NavigationController 或者 TabbarController 决定。
-
一个独立的ViewController,不包含于任何其他的ViewController。如果状态栏可见, topLayoutGuide表示状态栏的底部,否则表示这个ViewController的上边缘。
-
包含于其他ViewController的ViewController不对这个属性起决定作用, 而是由容器ViewController决定这个属性的含义:
1) 如果导航栏(NavigationBar可见topLayoutGuide表示导航栏的底部
2) 如果状态栏可见,topLayoutGuide表示状态栏的底部。
3) 如果都不可见,表示ViewController的上边缘。
这部分还比较好理解,总之是屏幕上方任何遮挡内容的栏的最底部。
二. 11.0之后的变化
iOS 11 开始弃用了这两个属性, 并且引入了 Safe Area 这个概念。
苹果建议: 不要把 Control 放在 SafeArea 之外的地方
 // These objects may be used as layout items in the NSLayoutConstraint API
    @available(iOS, introduced: 7.0, deprecated: 11.0)
   open var topLayoutGuide: UILayoutSupport { get }

  @available(iOS, introduced: 7.0, deprecated: 11.0)
    open var bottomLayoutGuide: UILayoutSupport { get }
今天, 来研究一下 iOS 11 中新引入的这个 API。
1.UIView 中的 safe area
iOS 11 中 UIViewController 的 topLayoutGuide 和 bottonLayoutGuide 两个属性被 UIView 中的 safe area 替代了。
 @available(iOS 11.0, *)
      open var safeAreaInsets: UIEdgeInsets { get }

     @available(iOS 11.0, *)
     open func safeAreaInsetsDidChange()
2.safeAreaInsets
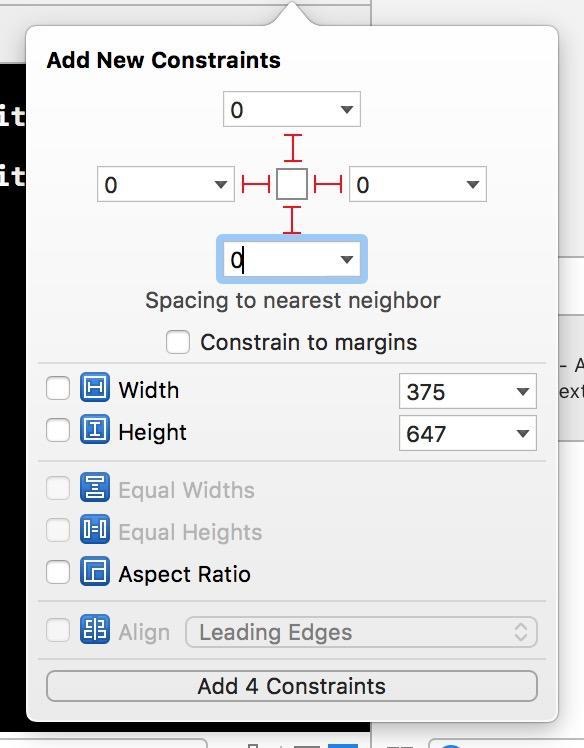
这个属性表示相对于屏幕四个边的间距, 而不仅仅是顶部还有底部。 这么说好像没有什么感觉, 我们来看一看这个东西分别在iPhoneX和iPhone8中是什么样的吧! 什么都没有做, 只是新建了一个工程然后在 Main.storyboard 中的 UIViewController 中拖了一个橙色的 View 并且设置约束为:
在 ViewController.swift 的 viewDidLoad 中打印
override func viewDidLoad() {
    super.viewDidLoad()
   print(view.safeAreaInsets)  }
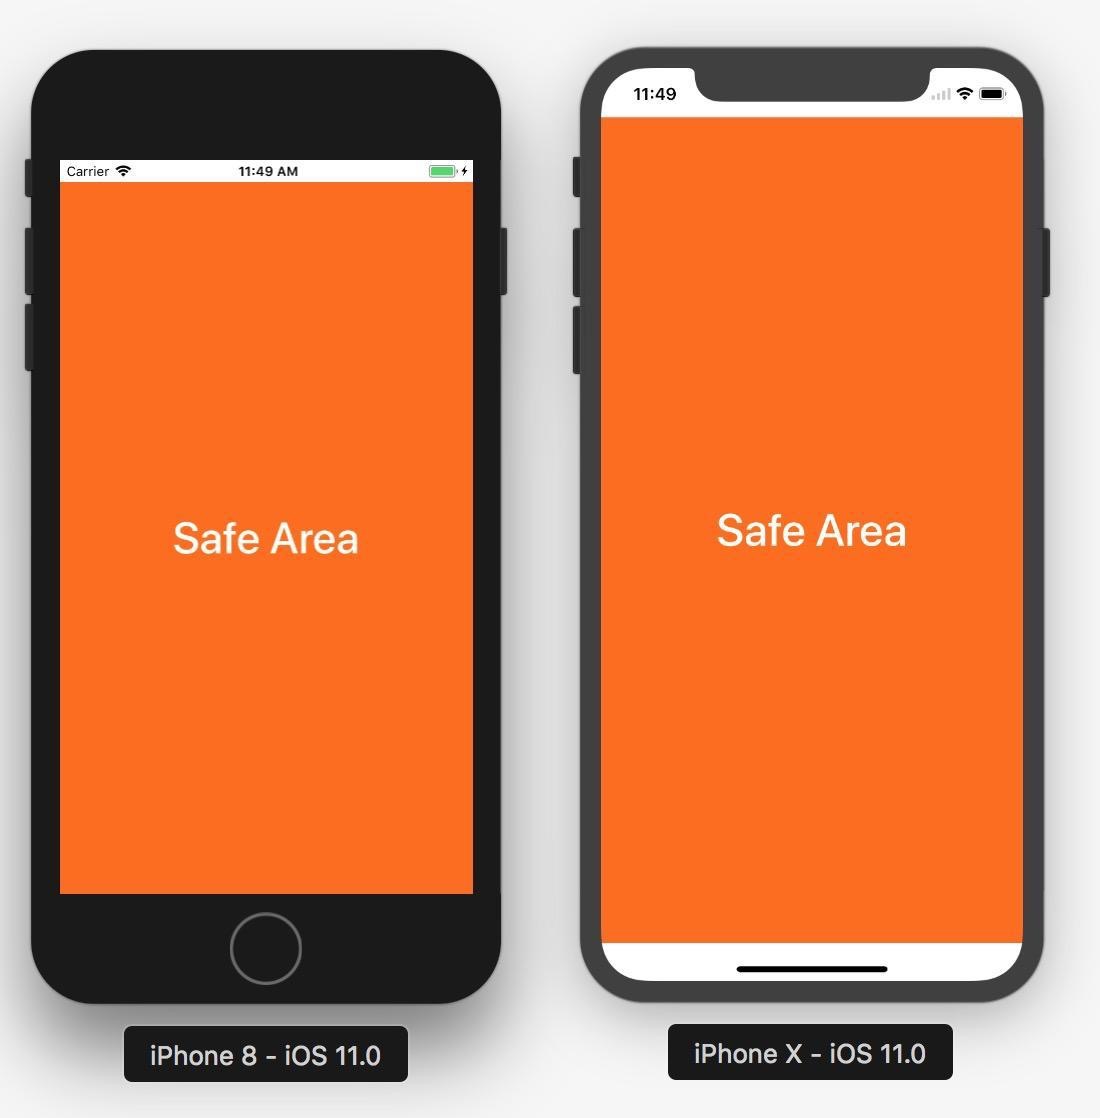
// 无论是iPhone 8 还是 iPhone X 输出结果均为 // UIEdgeInsets(top: 0.0, left: 0.0, bottom: 0.0, right: 0.0)
iPhone 8 VS iPhone X Safe Area (竖屏)
iPhone 8 VS iPhone X Safe Area (横屏)
这样对比可以看出, iPhone X 同时具有上下, 还有左右的 Safe Area。
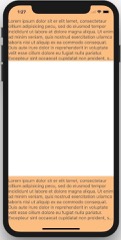
**再来看这个例子: ** 拖两个自定义的 View, 这个 View 上有一个 显示很多字的Label。然后设置这两个 View 的约束分别是:
let view1 = MyView()
let view2 = MyView()
view.addSubview(view1)
view.addSubview(view2)
let screenW = UIScreen.main.bounds.size.width
let screenH = UIScreen.main.bounds.size.height

view1.frame = CGRect(
    x: 0,
    y: 0,
    width:screenW,
    height: 200)

view2.frame = CGRect(
    x: 0,
    y: screenH - 200,
    width:screenW,
    height: 200)
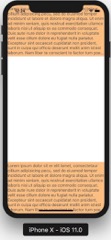
可以看出来, 子视图被顶部的刘海以及底部的 home 指示区挡住了。 我们可以使用 frame 布局或者 auto layout 来优化这个地方:
  let insets = UIApplication.shared.delegate?.window??.safeAreaInsets ?? UIEdgeInsets.zero

   view1.frame = CGRect(
       x: insets.left,
      y: insets.top,
       width:view.bounds.width - insets.left - insets.right,
       height: 200)

     view2.frame = CGRect(
       x: insets.left,
       y: screenH - insets.bottom - 200,
       width:view.bounds.width - insets.left - insets.right,
       height: 200)
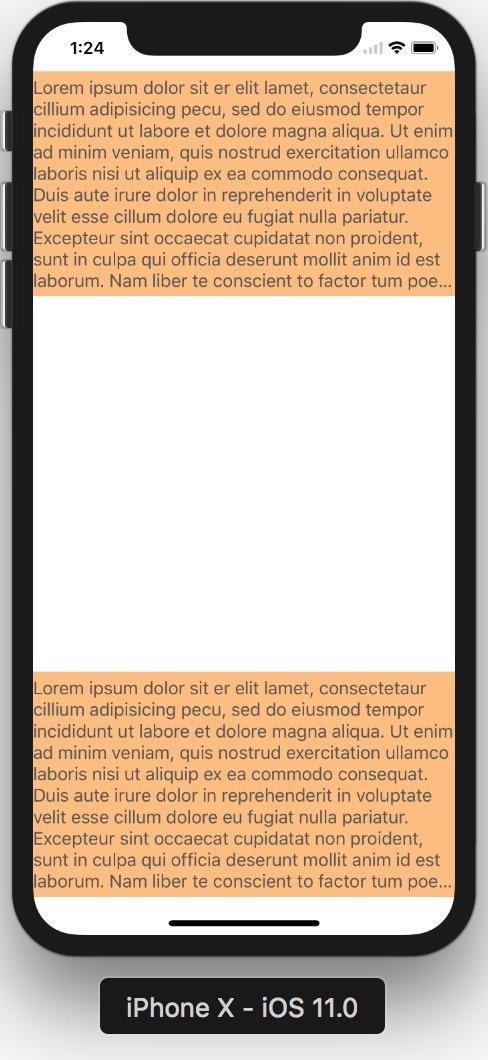
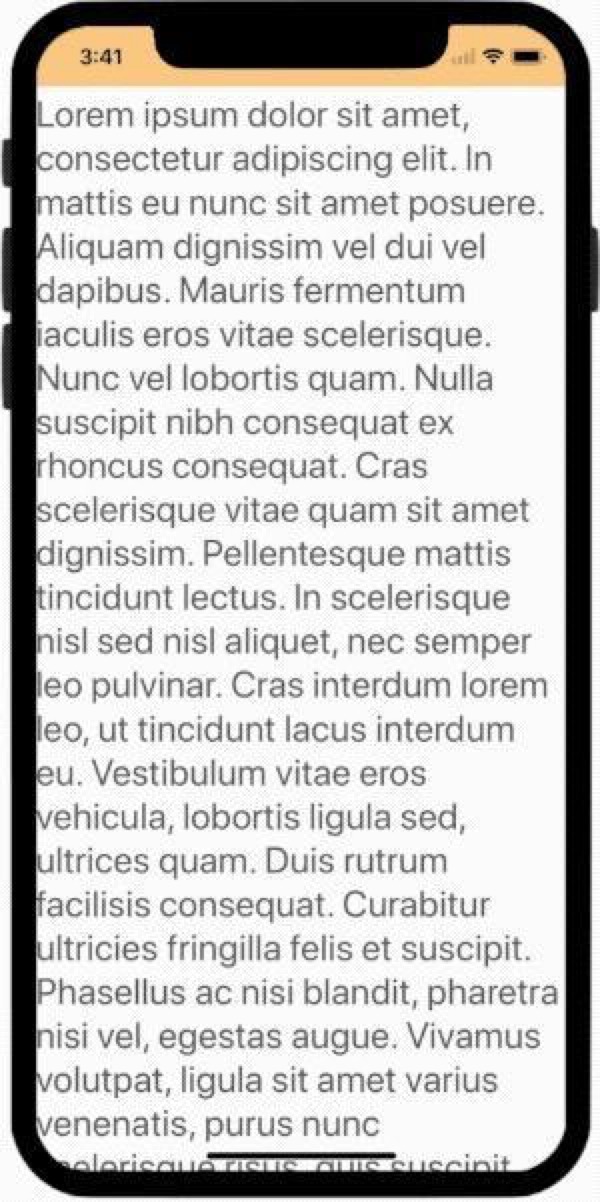
这样起来好多了, 还有另外一个更好的办法是直接在自定义的 View 中修改 Label 的布局:
override func layoutSubviews() {
    super.layoutSubviews()
    if #available(iOS 11.0, *) {
        label.frame = safeAreaLayoutGuide.layoutFrame
    }
}
3.UIViewController 中的 safe area
在 iOS 11 中 UIViewController 有一个新的属性
 @available(iOS 11.0, *)
 open var additionalSafeAreaInsets: UIEdgeInsets
当 view controller 的子视图覆盖了嵌入的子 view controller 的视图的时候。 比如说, 当 UINavigationController 和 UITabbarController 中的 bar 是 半透明(translucent) 状态的时候, 就有additionalSafeAreaInsets
自定义的 View 上面的 label 布局兼容了 safe area。
 // UIView
 @available(iOS 11.0, *)
 open func safeAreaInsetsDidChange()

 //UIViewController
 @available(iOS 11.0, *)
 open func viewSafeAreaInsetsDidChange()
这两个方法分别是 UIView 和 UIViewController 的 safe area insets 发生改变时 调用的方法,如果需要做一些处理,可以重写这个方法。有点类似于 KVO 的意思。
4.模拟 iPhone X 的 safe area
额外的 safe area insets 也能用来测试你的 app 是否支持 iPhone X。 在没有 iPhone X 也不方便使用模拟器的时候, 这个还是很有用的。
//竖屏
additionalSafeAreaInsets.top = 24.0
additionalSafeAreaInsets.bottom = 34.0

//竖屏, status bar 隐藏
additionalSafeAreaInsets.top = 44.0
additionalSafeAreaInsets.bottom = 34.0

//横屏
additionalSafeAreaInsets.left = 44.0
additionalSafeAreaInsets.bottom = 21.0
additionalSafeAreaInsets.right = 44.0
5.UIScrollView 中的 safe area
在 scroll view 上加一个 label。设置scroll 的约束为:
        scrollView.snp.makeConstraints { (make) in
            make.edges.equalToSuperview()
        }
iOS 7 中引入 UIViewController 的 automaticallyAdjustsScrollViewInsets 属性在 iOS11 中被废弃掉了。取而代之的是 UIScrollView 的
contentInsetAdjustmentBehavior
@available(iOS 11.0, *)
public enum UIScrollViewContentInsetAdjustmentBehavior : Int {
    case automatic          //default value
    case scrollableAxes
    case never
    case always
}


@available(iOS 11.0, *)
open var contentInsetAdjustmentBehavior: UIScrollViewContentInsetAdjustmentBehavior
6. Content Insets Adjustment Behaviornever 不做调整。
scrollableAxes content insets 只会针对 scrollview 滚动方向做调整。
always content insets 会针对两个方向都做调整。
automatic 这是默认值。当下面的条件满足时, 它跟 always 是一个意思
1. 能够水平滚动,不能垂直滚动
2. scroll view 是 当前 view controller 的第一个视图
3. 这个controller 是被navigationcontroller 或者 tabBarController管理的
4. automaticallyAdjustsScrollViewInsets 为 true 在其他情况下 automatic 跟 scrollableAxes 一样
7.Adjusted Content Insets
iOS 11 中 UIScrollView 新加了一个属性: adjustedContentInset
@available(iOS 11.0, *)
open var adjustedContentInset: UIEdgeInsets { get }
adjustedContentInset 和 contentInset 之间有什么区别呢?
在同时有 navigation 和 tabbar 的 viewcontroller 中添加一个 scrollview 然后分别打印两个值:
//iOS 10
//contentInset = UIEdgeInsets(top: 64.0, left: 0.0, bottom: 49.0, right: 0.0)
//iOS 11
//contentInset = UIEdgeInsets(top: 0.0, left: 0.0, bottom: 0.0, right: 0.0)
//adjustedContentInset = UIEdgeInsets(top: 64.0, left: 0.0, bottom: 49.0, right: 0.0)
然后再设置:
// 给 scroll view 的四个方向都加 10 的间距
scrollView.contentInset = UIEdgeInsets(top: 10, left: 10, bottom: 10, right: 10)
打印:
//iOS 10
//contentInset = UIEdgeInsets(top: 74.0, left: 10.0, bottom: 59.0, right: 10.0)
//iOS 11
//contentInset = UIEdgeInsets(top: 10.0, left: 10.0, bottom: 10.0, right: 10.0)
//adjustedContentInset = UIEdgeInsets(top: 74.0, left: 10.0, bottom: 59.0, right: 10.0)
由此可见,在 iOS 11 中 scrollview 实际的 contentinset 可以通过 adjustedContentInset 获取。这就是说如果你要适配 iOS 10 的话。 这一部分的逻辑是不一样的。
系统还提供了两个方法来监听这个属性的改变
//UIScrollView
@available(iOS 11.0, *)
open func adjustedContentInsetDidChange()

//UIScrollViewDelegate
@available(iOS 11.0, *)
optional public func scrollViewDidChangeAdjustedContentInset(_ scrollView: UIScrollView)
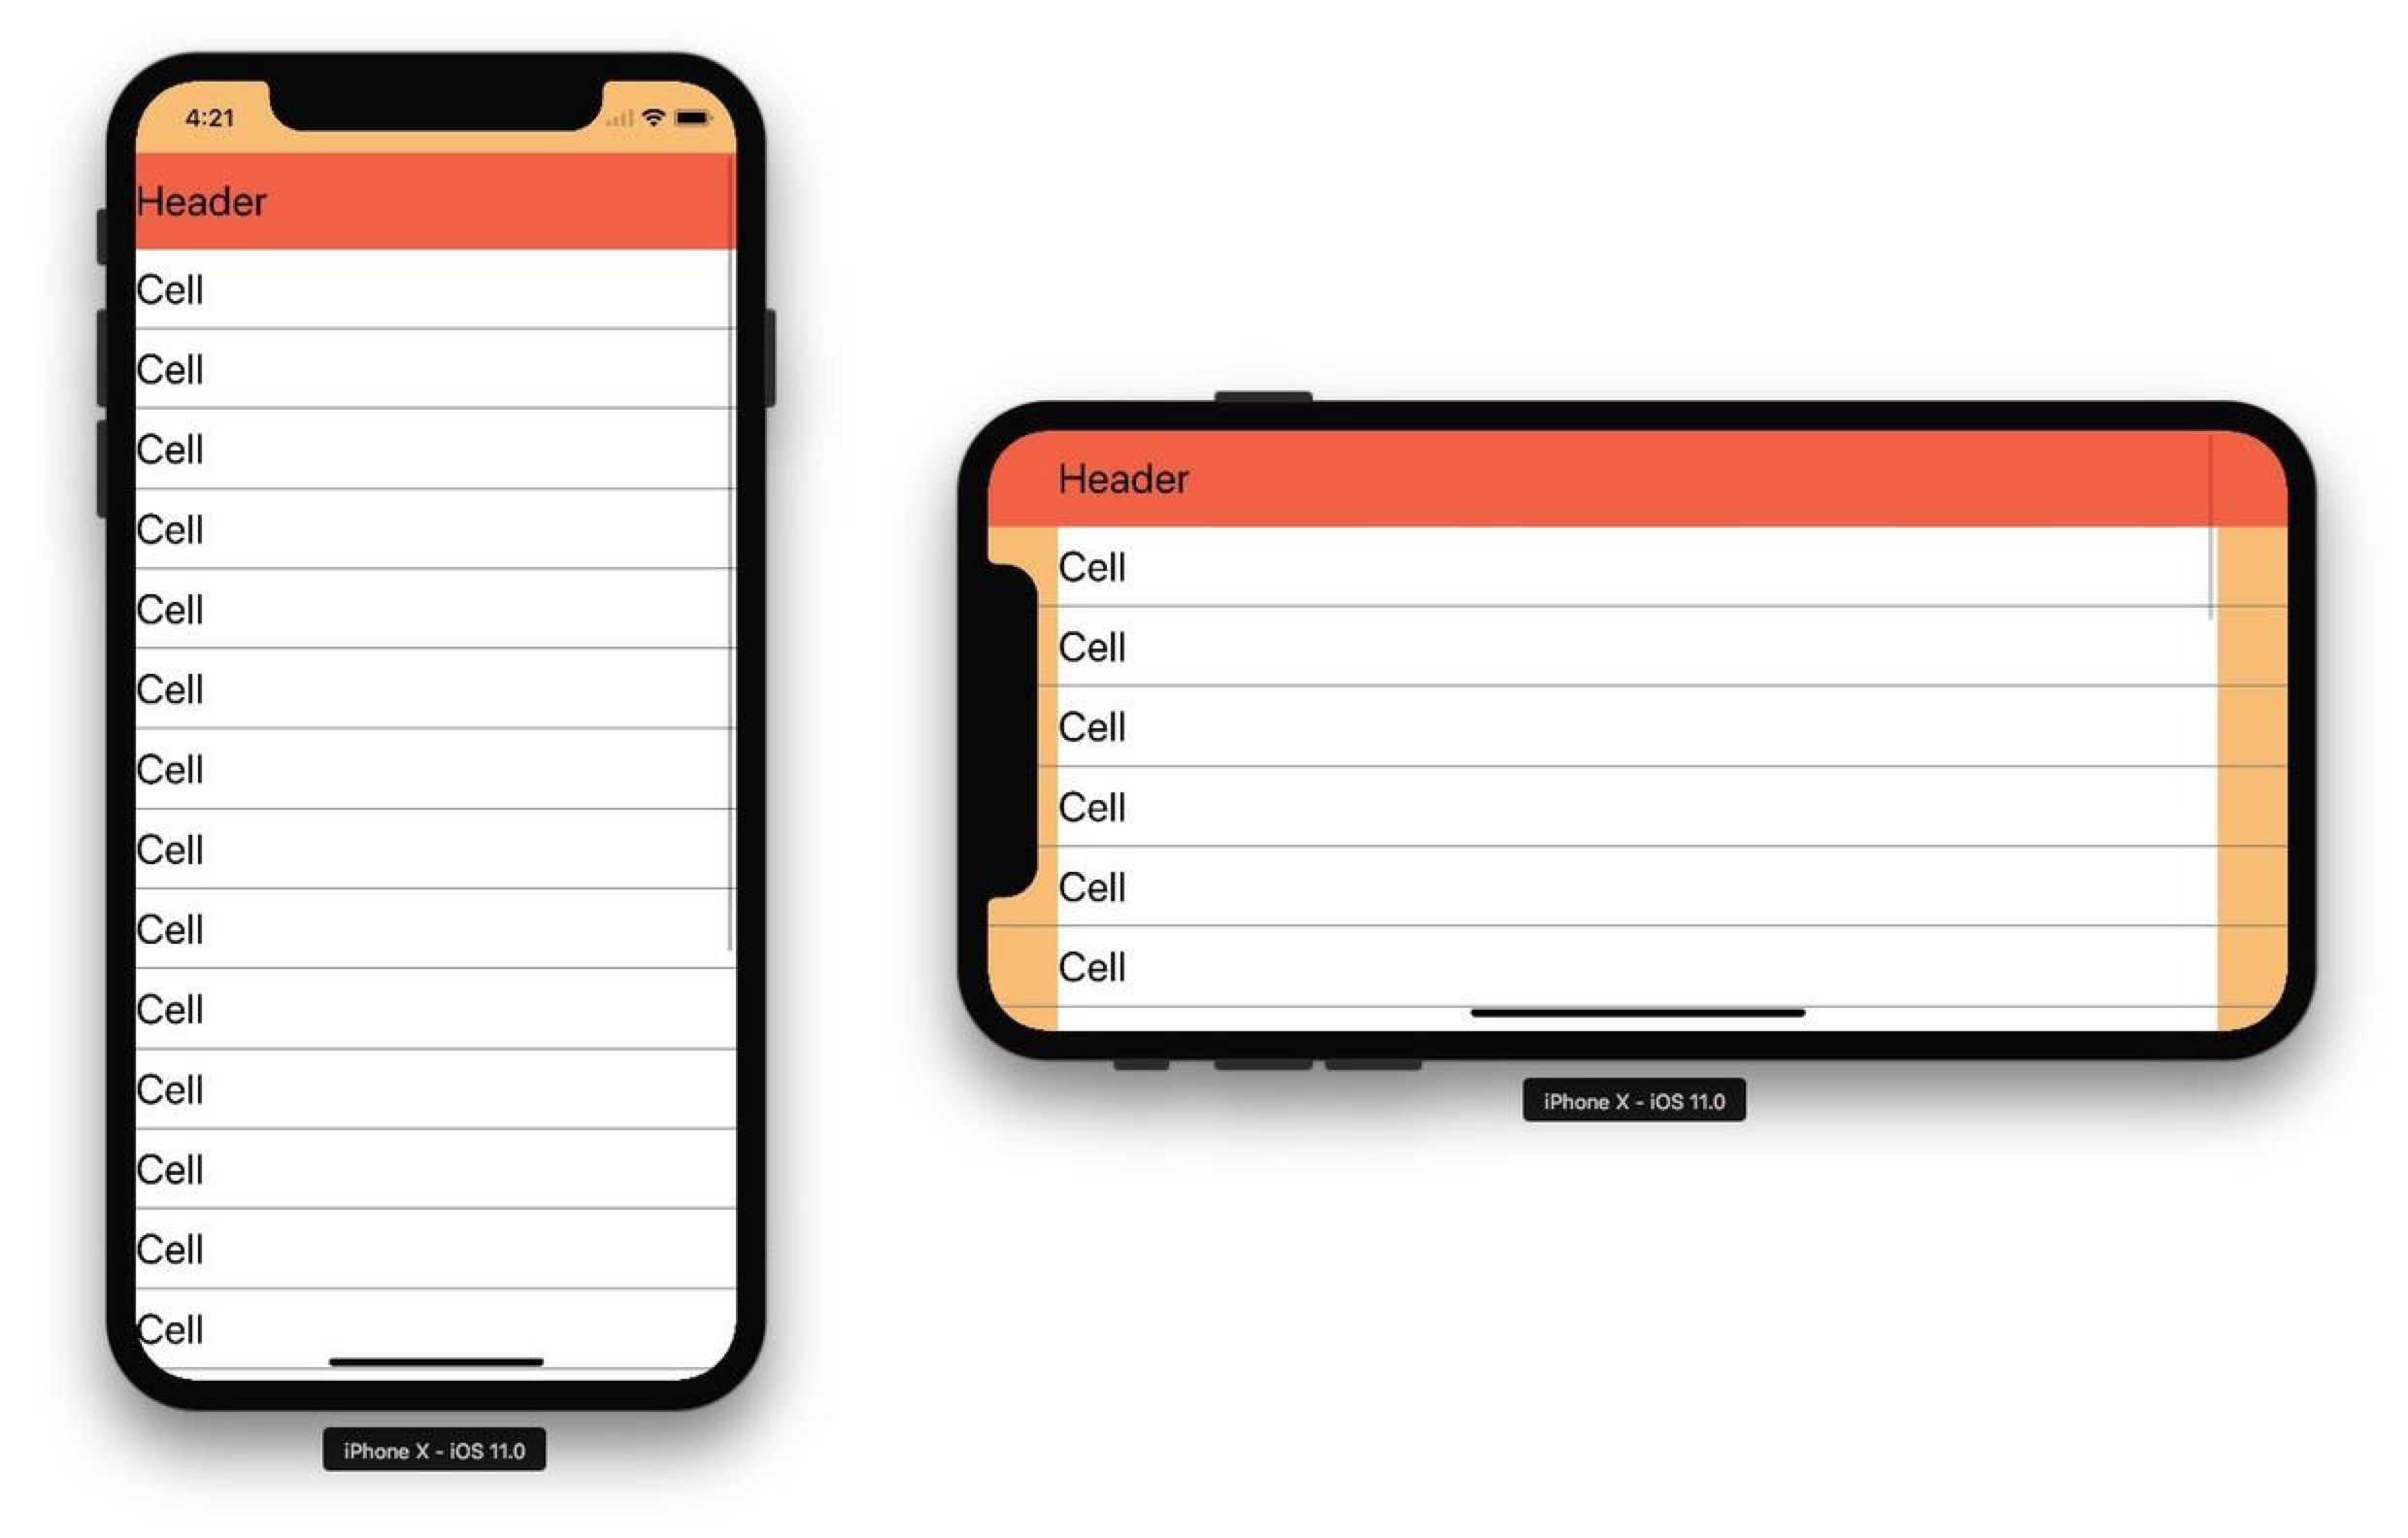
8. UITableView 中的 safe area
我们现在再来看一下 UITableView 中 safe area 的情况。我们先添加一个有自定义 header 以及自定义 cell 的 tableview。设置边框为 self.view 的边框。也就是
tableView.snp.makeConstraints { (make) in
    make.edges.equalToSuperview()
}
// 或者

tableView.frame = view.bounds
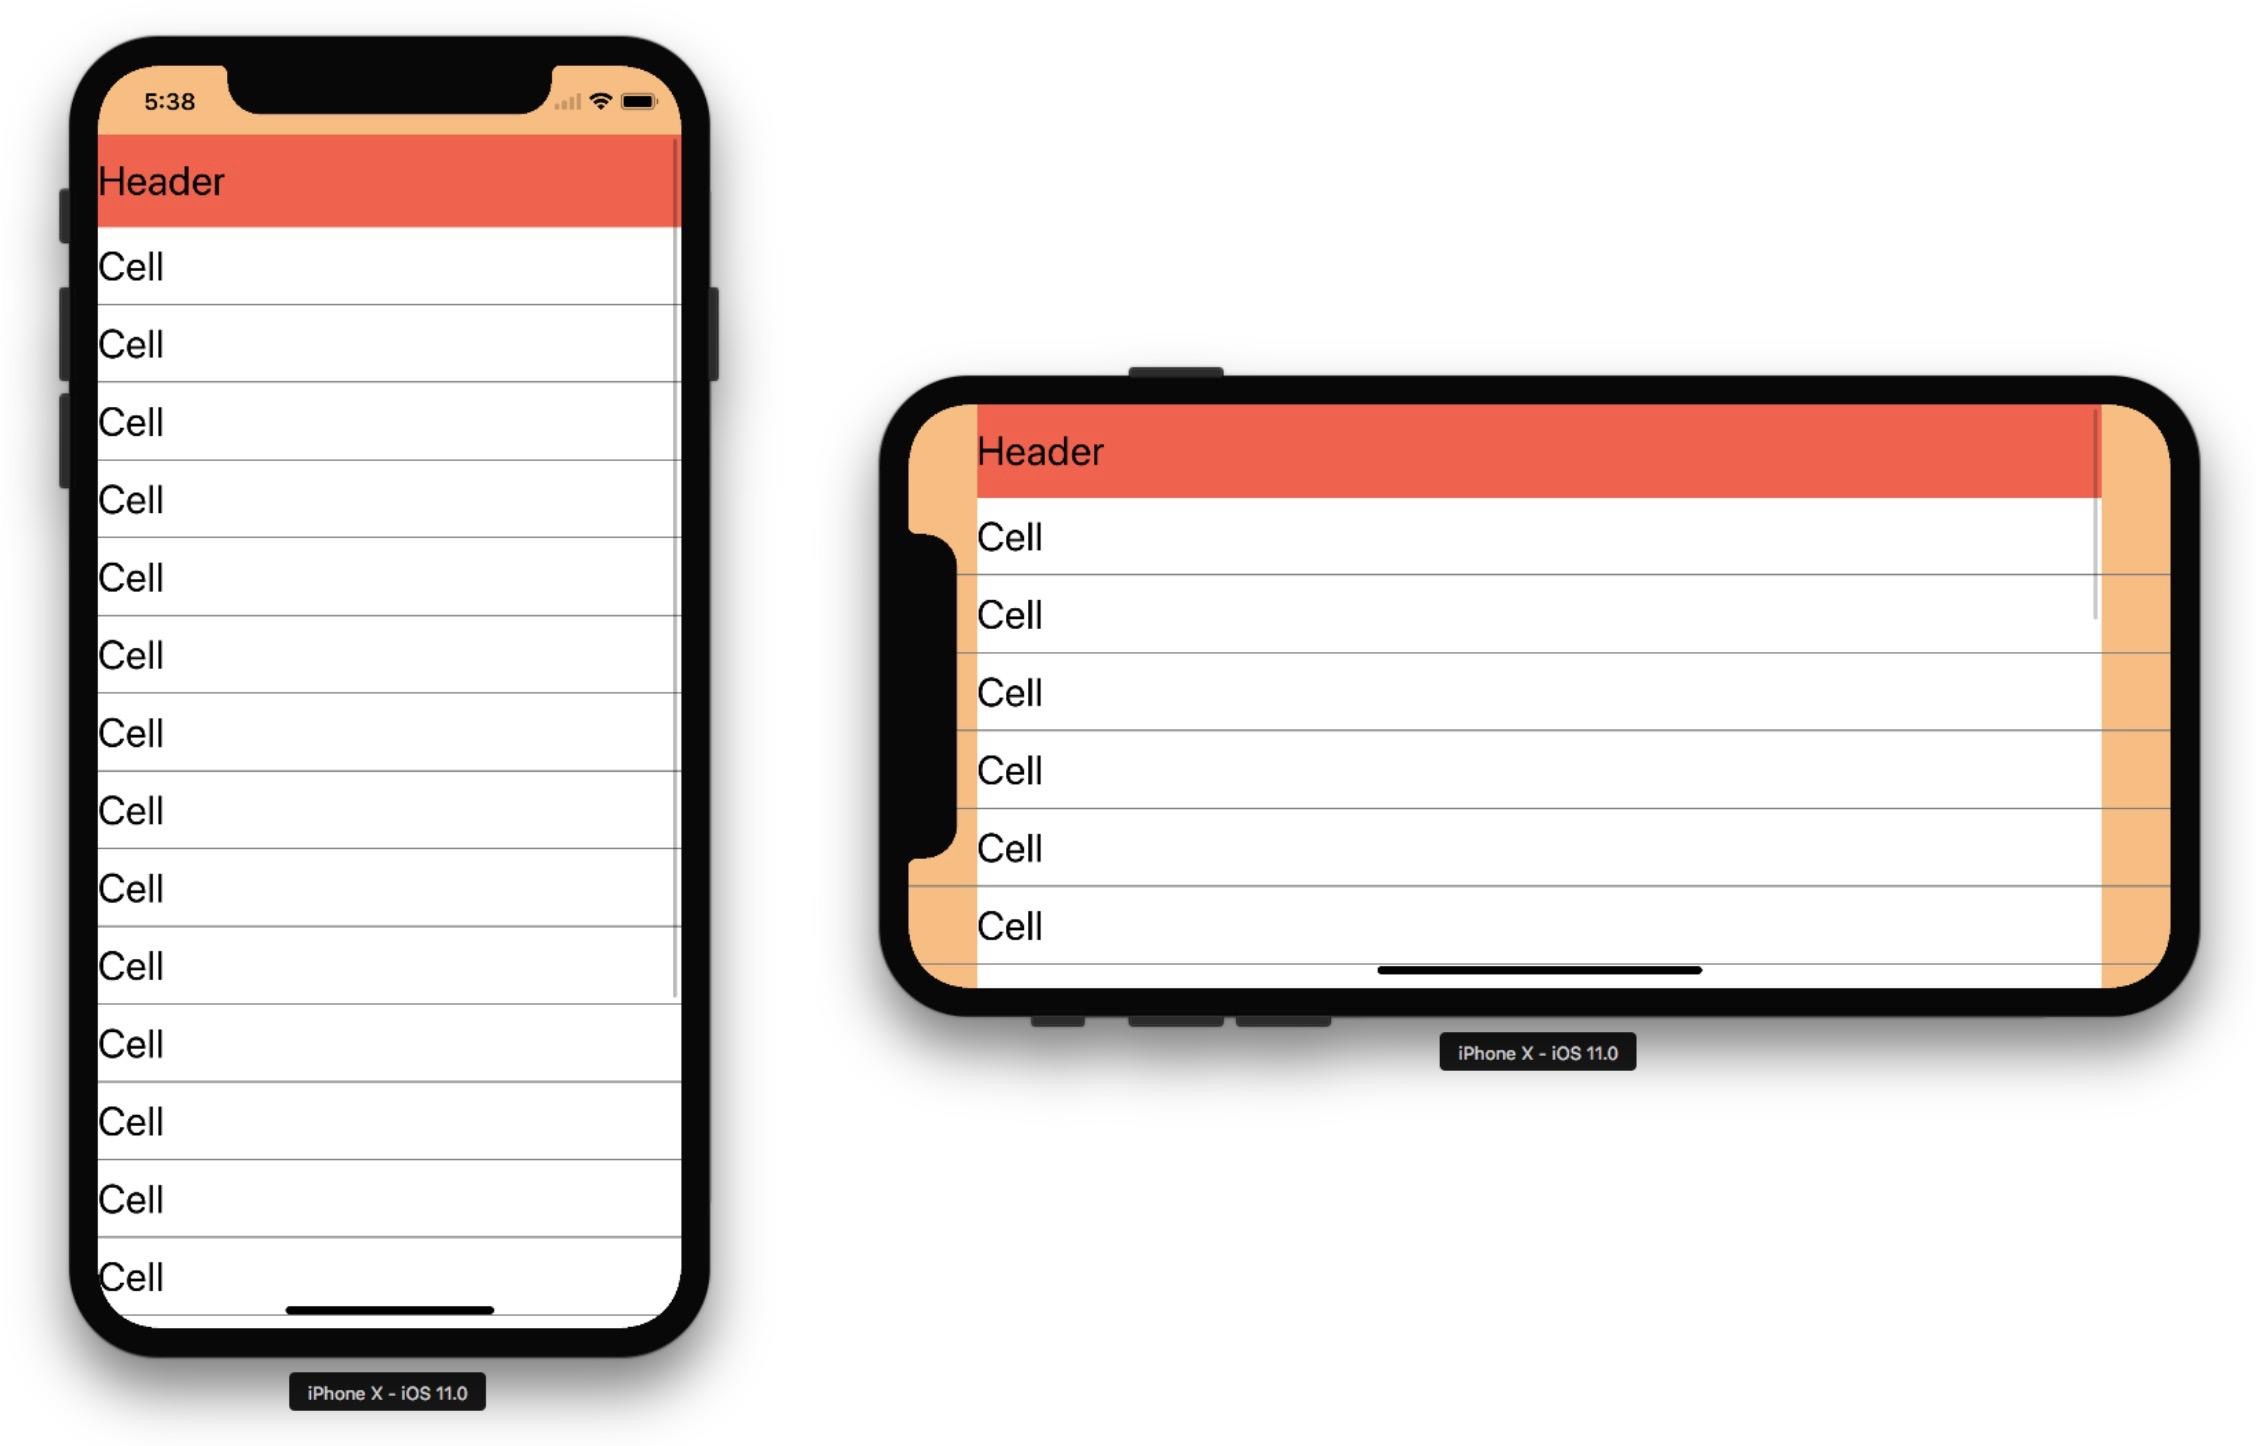
自定义的 header 上面有一个 label,自定义的 cell 上面也有一个 label。 将屏幕横屏之后会发现,cell 以及 header 的布局均自动留出了 safe area 以外的距离。 cell 还是那么大,只是 cell 的 contnt view 留出了相应的距离。这其实是 UITableView 中新引入的属性管理的:
@available(iOS 11.0, *)
open var insetsContentViewsToSafeArea: Bool
insetsContentViewsToSafeArea 的默认值是 true, 将其设置成 no 之后:

可以看出来 footer 和 cell 的 content view 的大小跟 cell 的大小相同了。这就是说:
在iOS11下,并不需要改变 header/footer/cell的布局,系统会自动区适配 safeArea
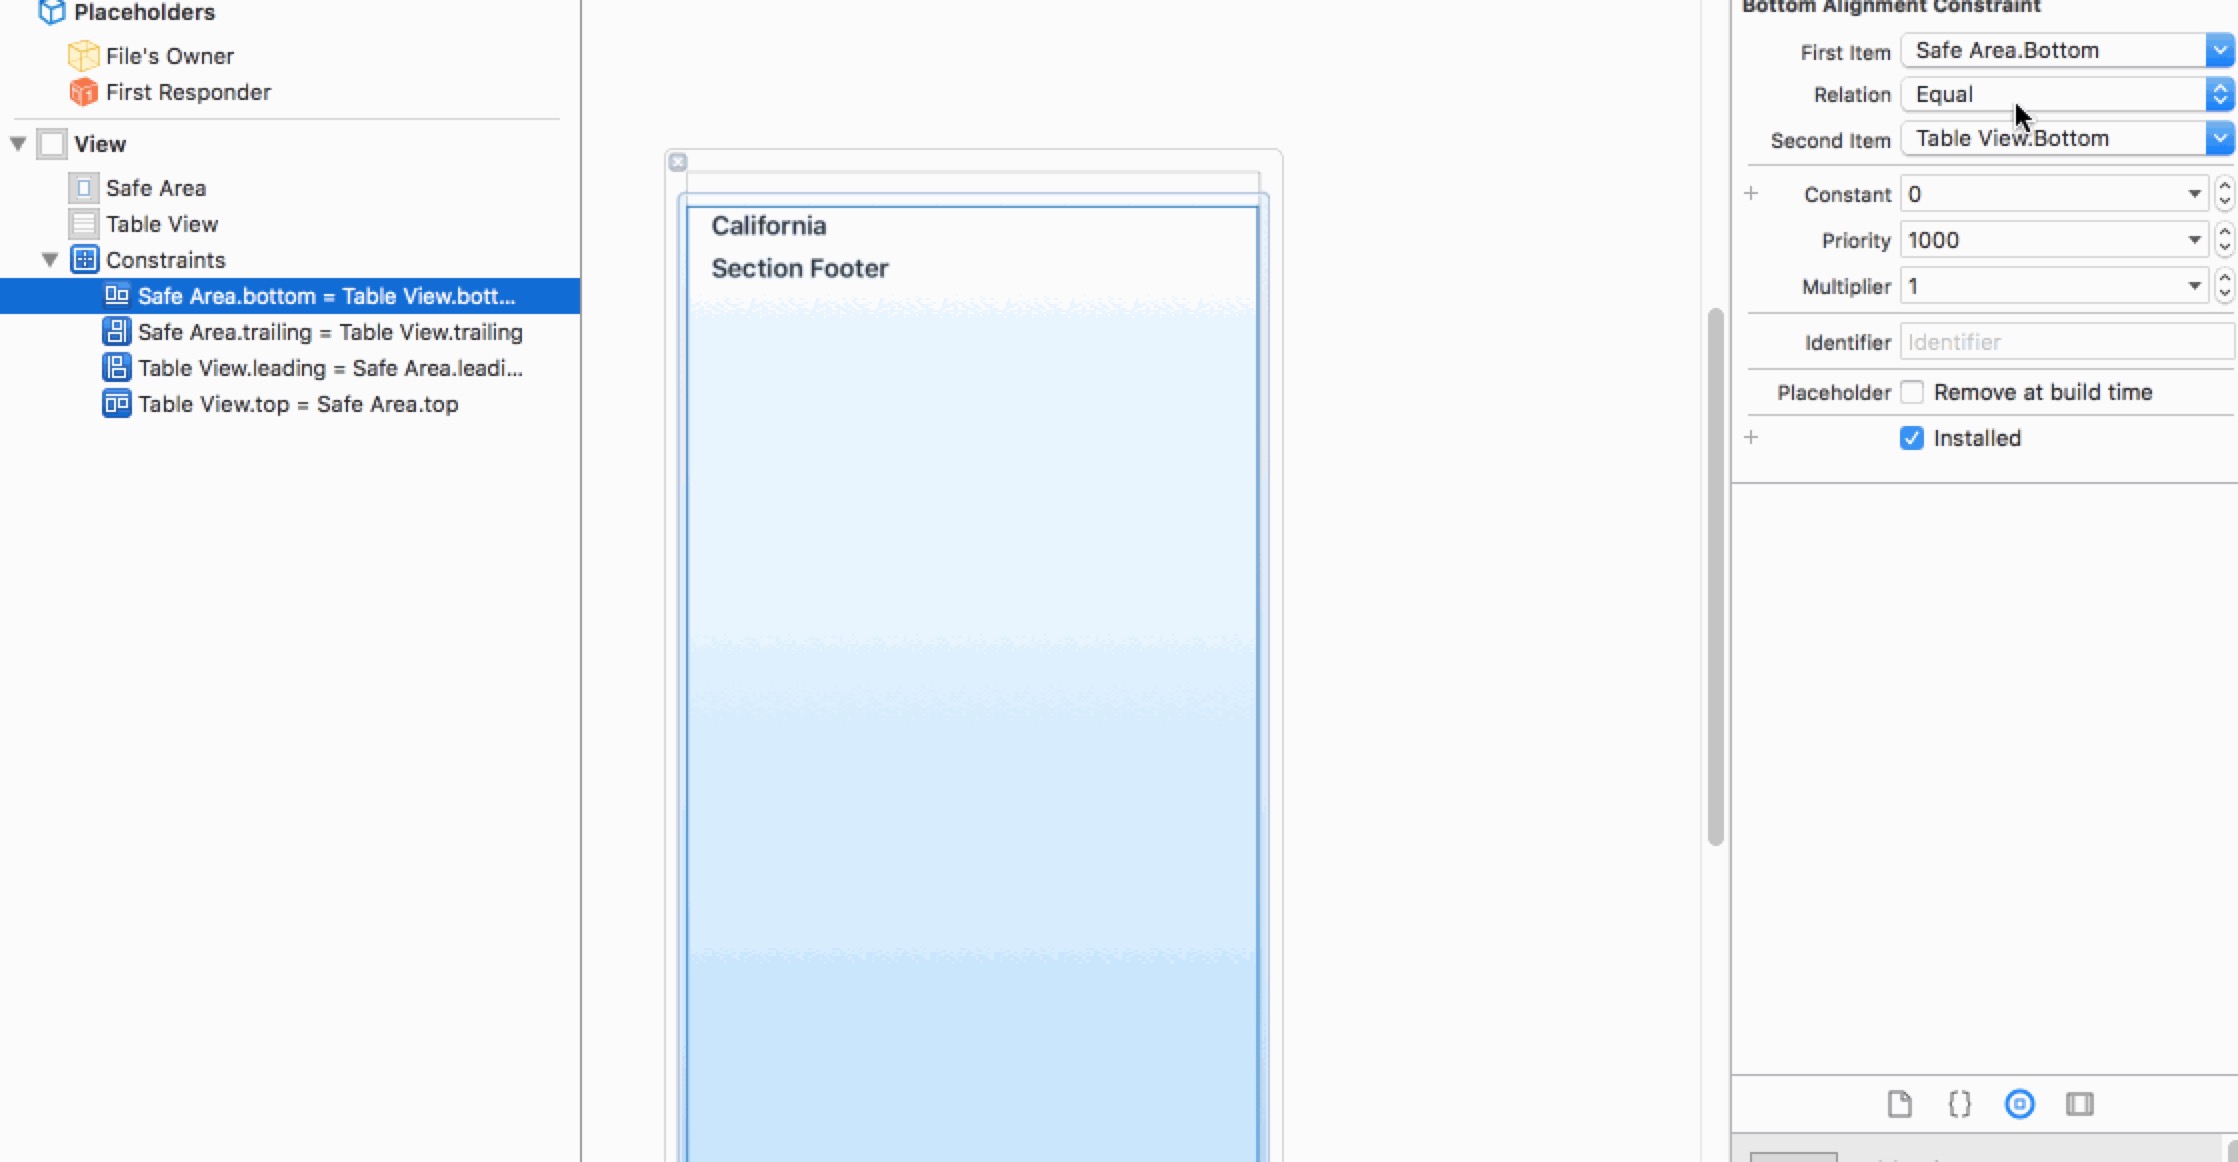
需要注意的是, Xcode 9 中使用 IB 拖出来的 TableView 默认的边框是 safeArea 的。 所以实际运行起来 tableview 都是在 safeArea 之内的。
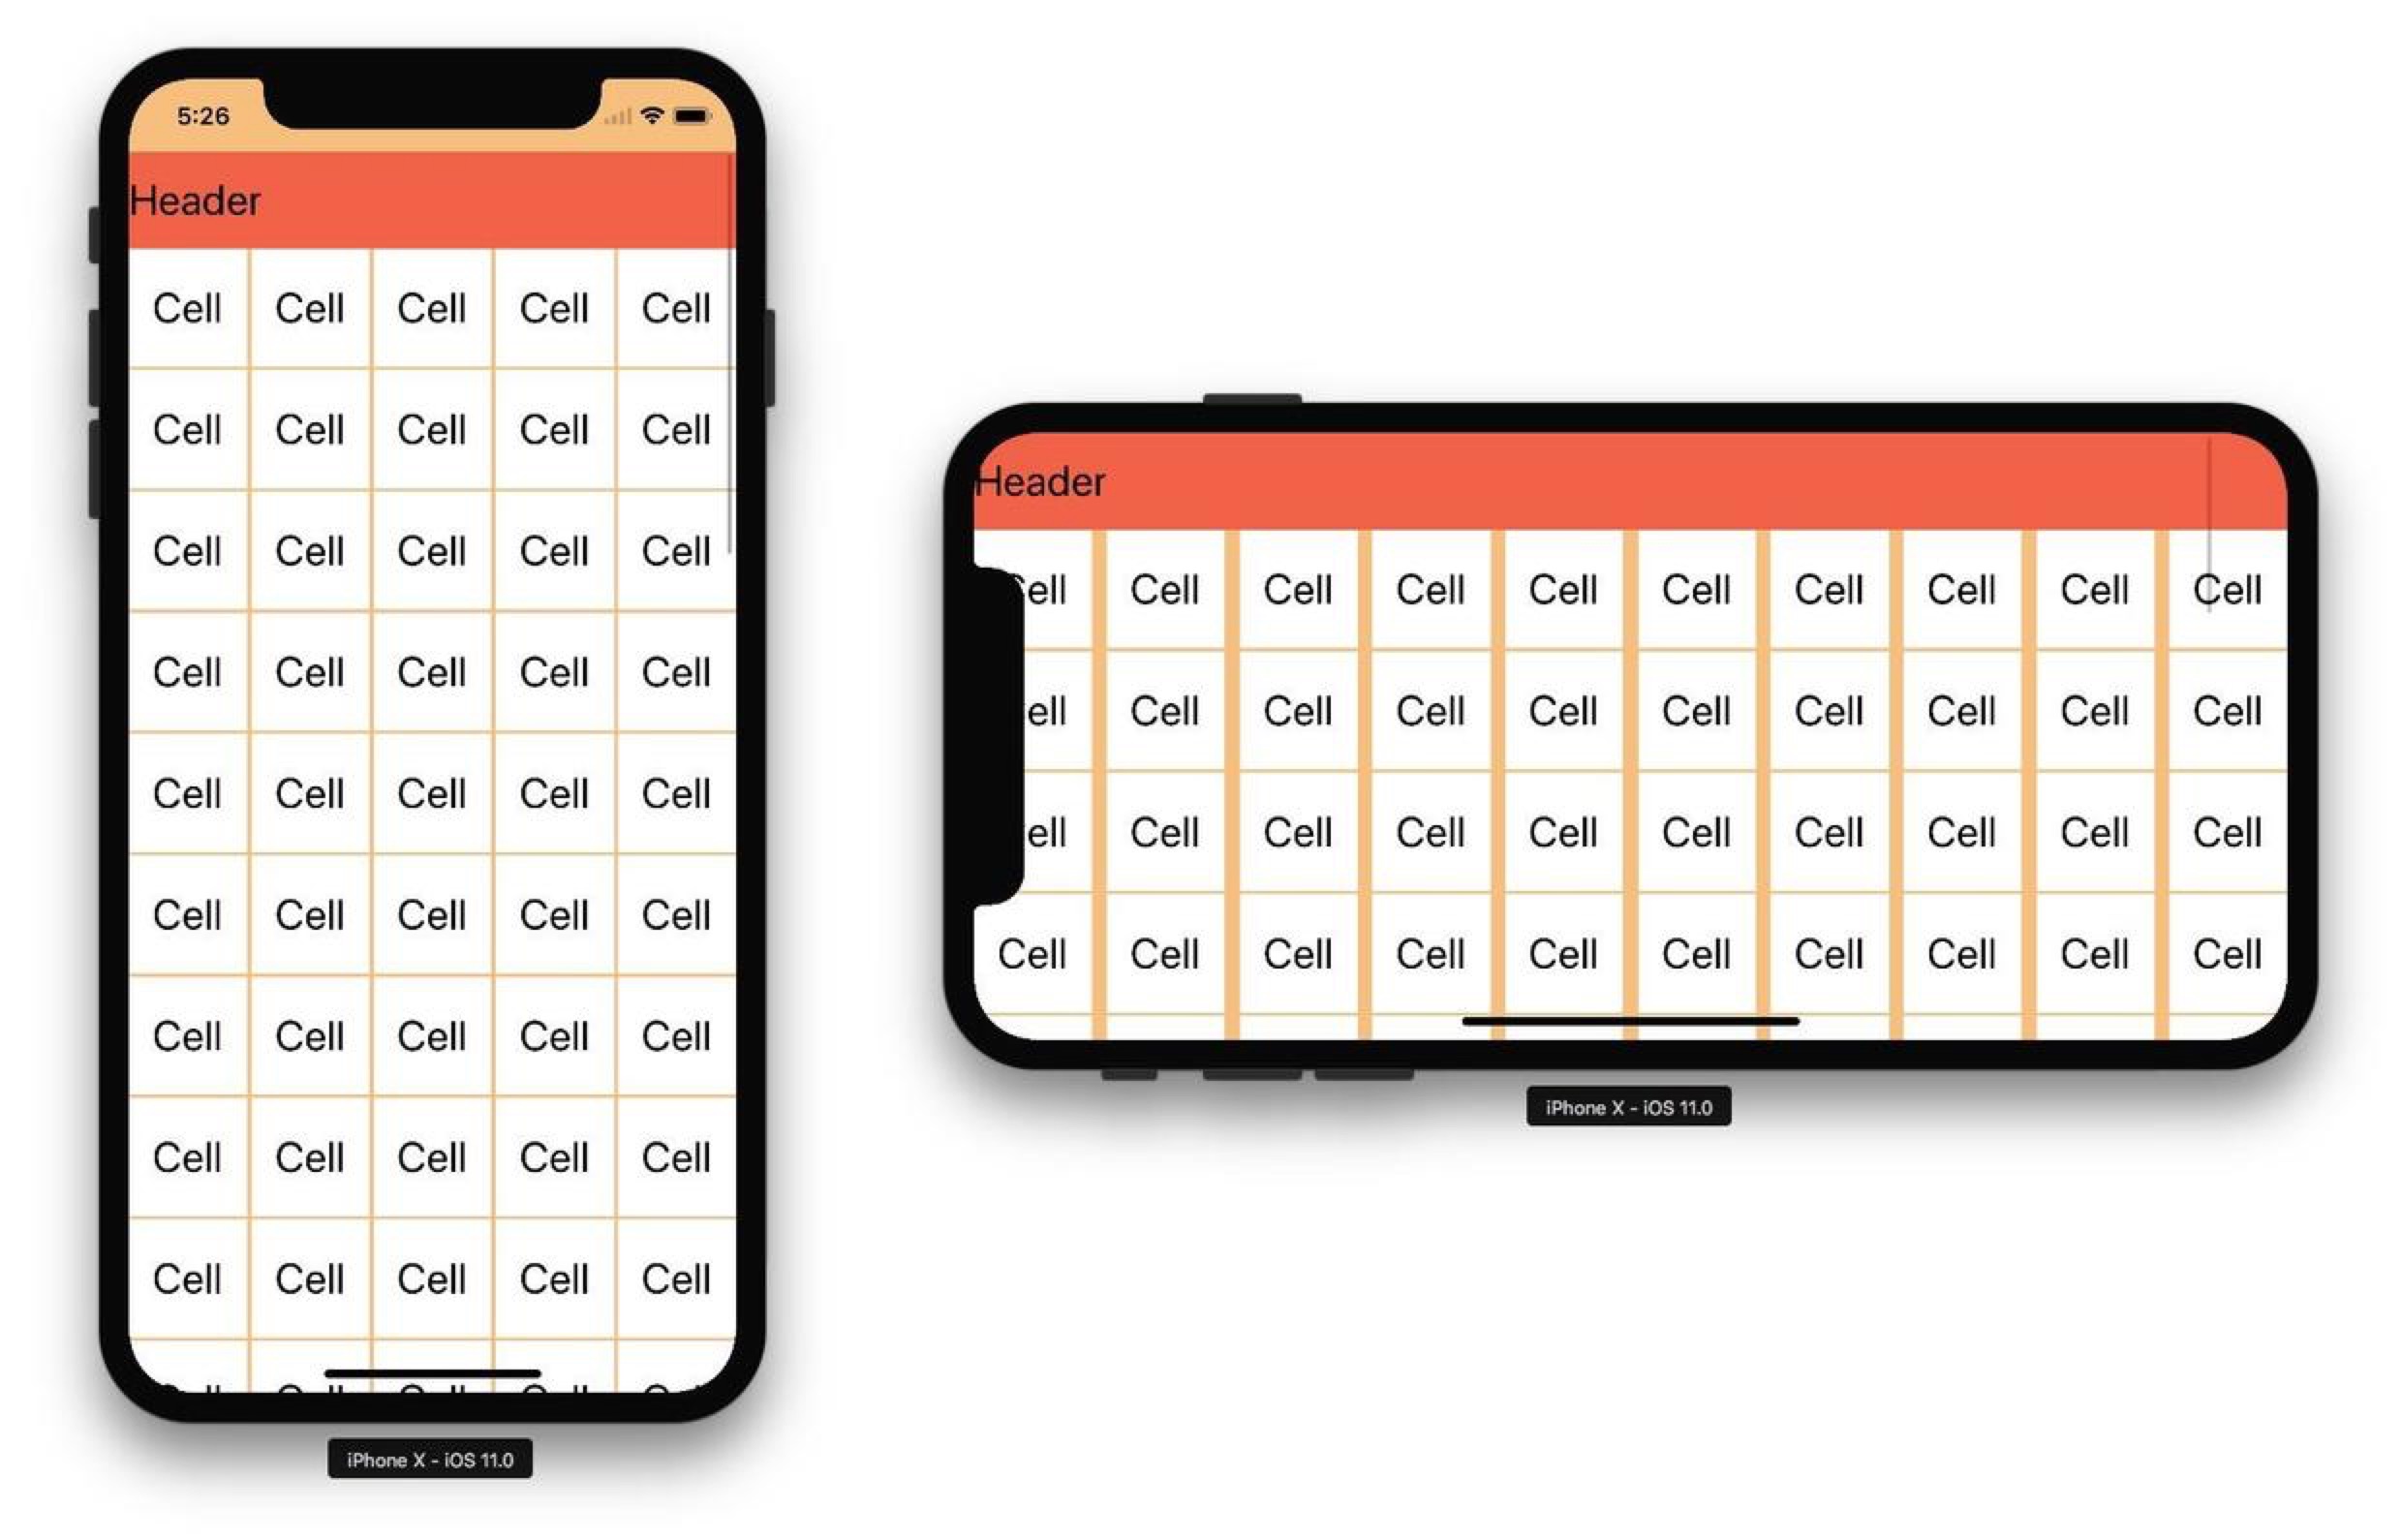
9.UICollectionView 中的 safe area
我们在做一个相同的 collection view 来看一下 collection view 中是什么情况:

这是一个使用了 UICollectionViewFlowLayout 的 collection view。滑动方向是竖向的。 cell 透明, cell 的 content view 是白色的。这些都跟上面 table view 一样。 header(UICollectionReusableView) 没有 contentView 的概念, 所以给其自身设置了红色的背景。
从截图上可以看出来, collectionView 并没有默认给 headerCellFooter添加safeArea 的间距。能够将布局调整到合适的情况的方法只有将 header/ footer / cell 的子视图跟其 safeArea 关联起来。跟 IB 中拖 table view 一个道理。
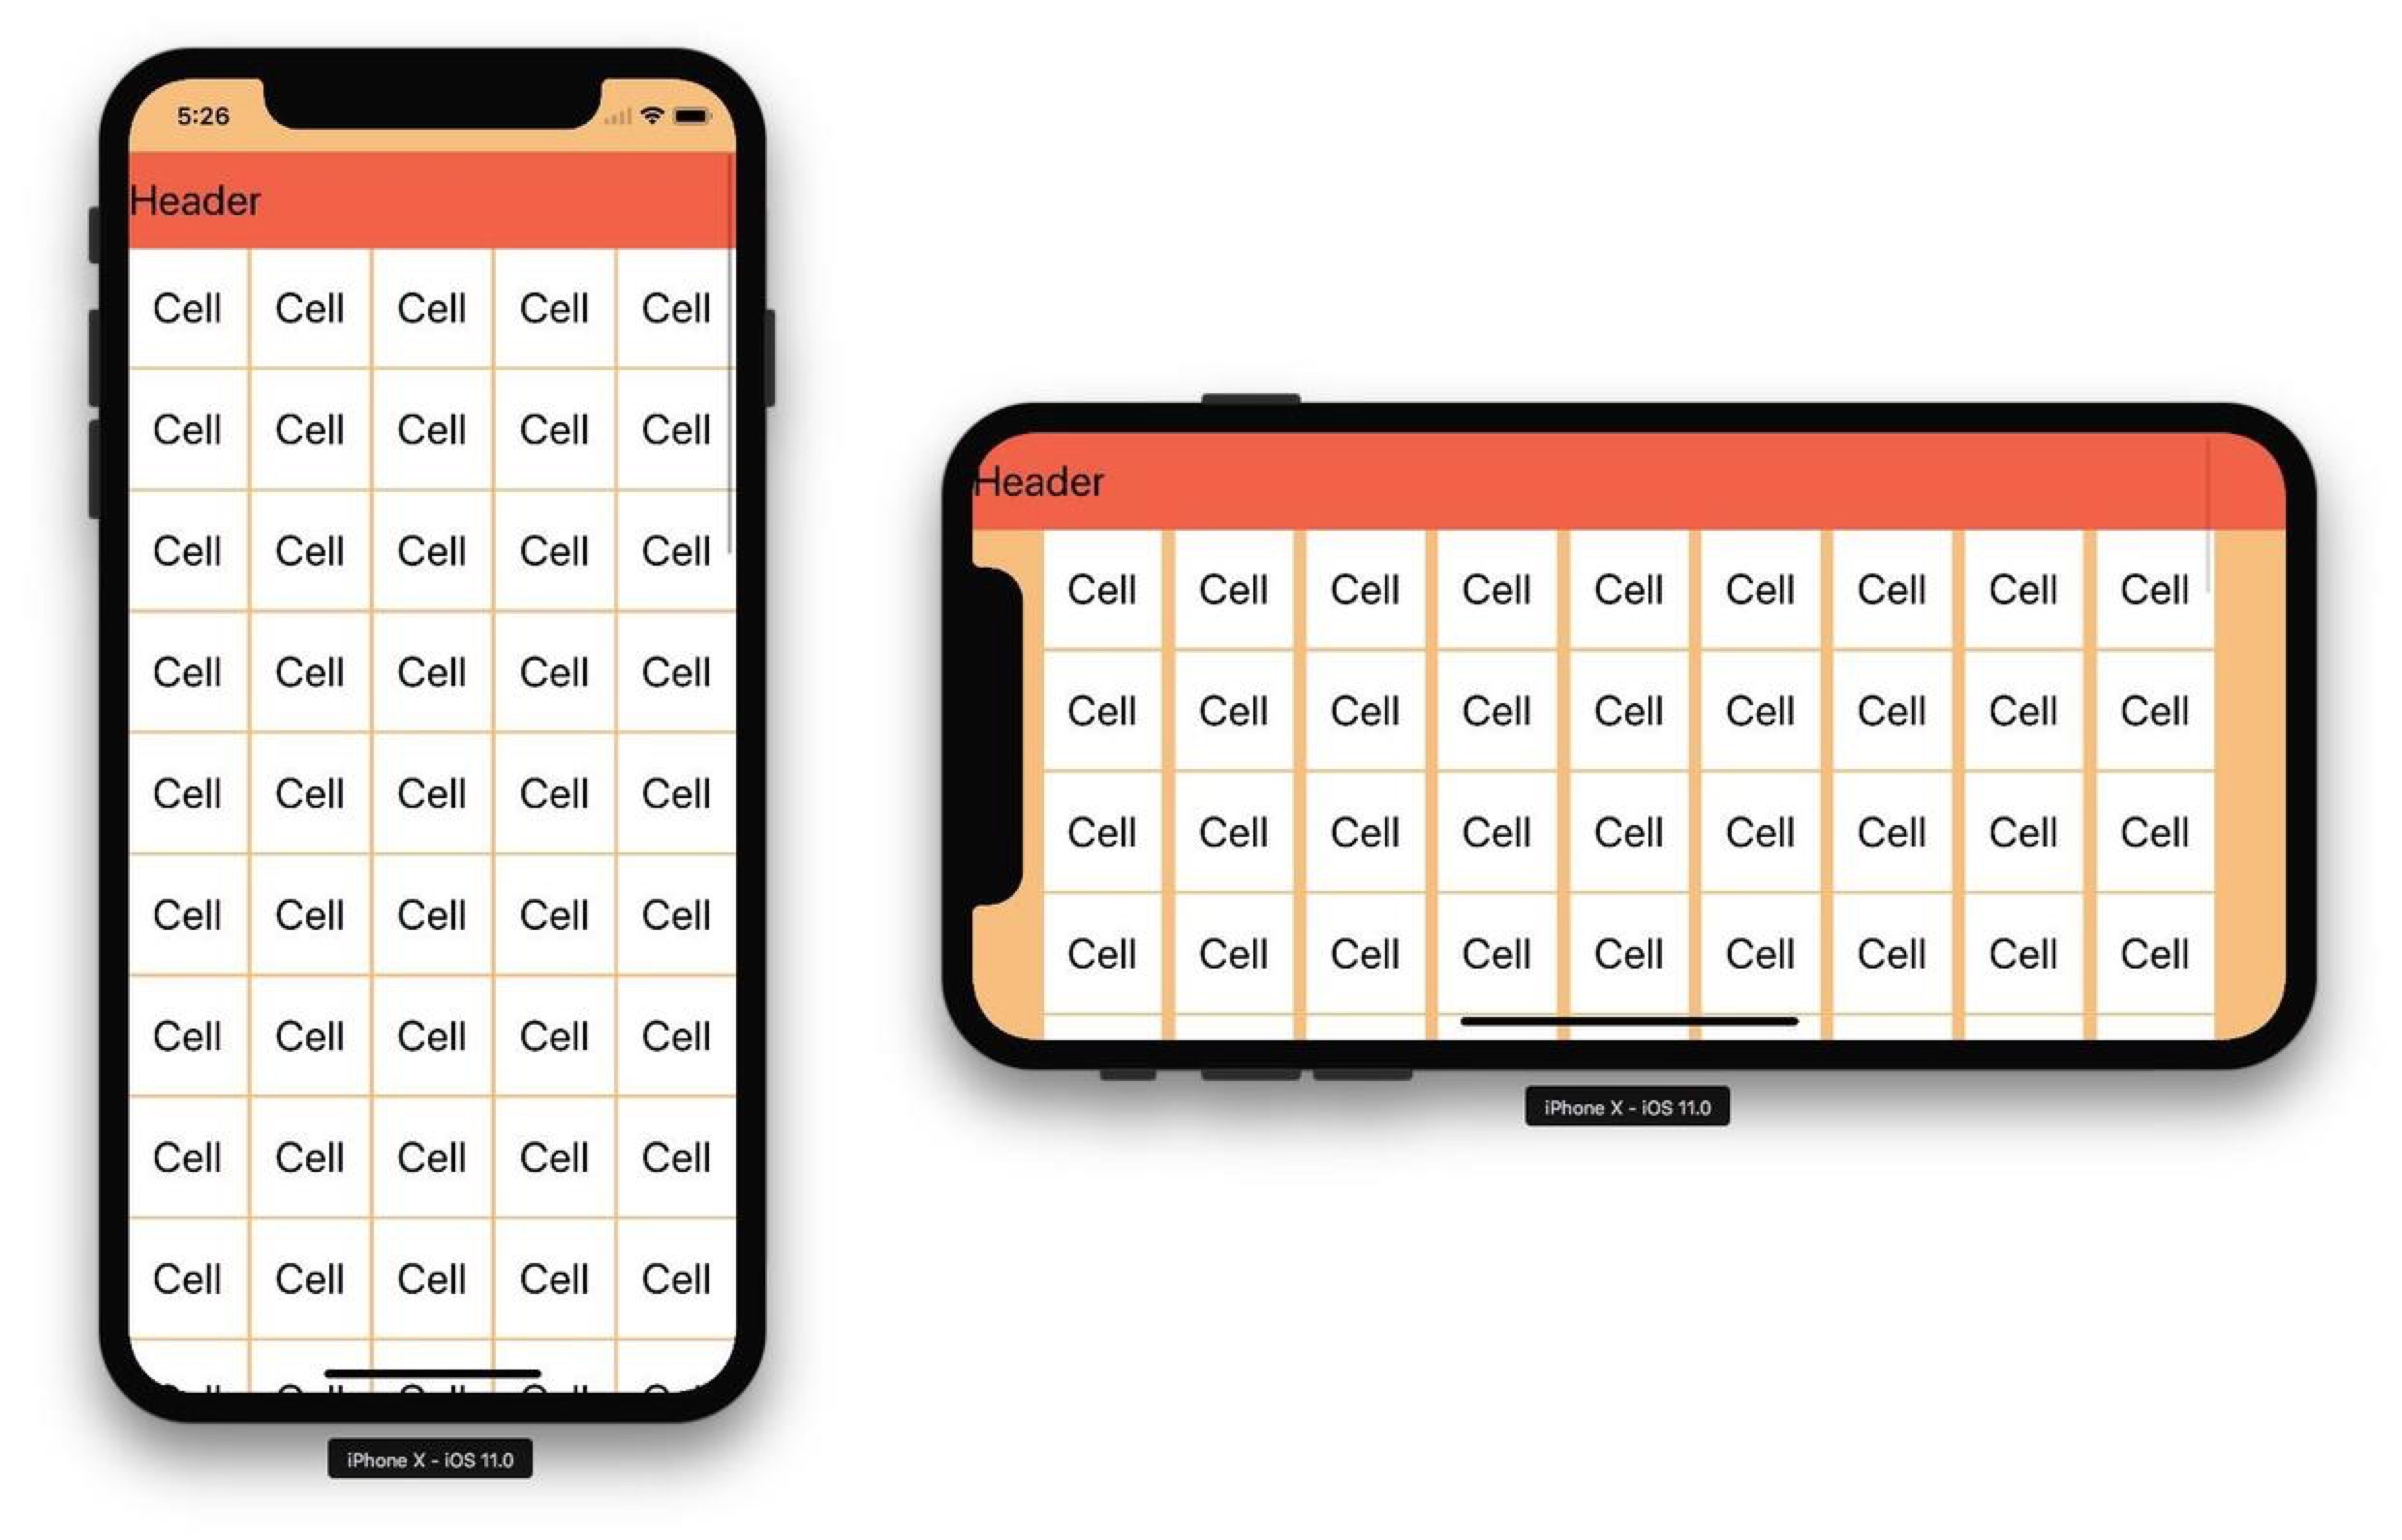
现在我们再试试把布局调整成更像 collectionView 那样:
截图上可以看出来横屏下, 左右两边的 cell 都被刘海挡住了。这种情况下, 我们可以通过修改 sectionInsets 来适配 safeArea 来解决这个问题。但是再 iOS 11 中, UICollectionViewFlowLayout 提供了一个新的属性 sectionInsetReference来帮你做 这件事情。
@available(iOS 11.0, *)
public enum UICollectionViewFlowLayoutSectionInsetReference : Int {

    case fromContentInset

    case fromSafeArea

    case fromLayoutMargins
}

/// The reference boundary that the section insets will be defined as relative to. Defaults to `.fromContentInset`.
/// NOTE: Content inset will always be respected at a minimum. For example, if the sectionInsetReference equals `.fromSafeArea`, but the adjusted content inset is greater that the combination of the safe area and section insets, then section content will be aligned with the content inset instead.
@available(iOS 11.0, *)
open var sectionInsetReference: UICollectionViewFlowLayoutSectionInsetReference
可以看出来,系统默认是使用 .fromContentInset 我们再分别修改, 看具体会是什么样子的。
这种情况下 section content insets 等于原来的大小加上 safe area insets 的大小。 跟使用 .fromLayoutMargins 相似使用这个属性 colection view 的 layout margins 会被添加到 section content insets 上面。

10. IB 中的 Safe Area
前面的例子都说的是用代码布局要实现的部分。但是很多人都还是习惯用 InterfaceBuilder 来写 UI界面。苹果在 WWDC 2107 Session 412 中提到:Storyboards 中的 safeArea 是向下兼容的 也就是说, 即使在iOS10及以下的target中也可以使用 afeArea来做布局。 唯一需要做的就是给每个 stroyboard勾选 Use Safe Area Layout Guide。 实际测试看,应该是 iOS9 以后都只需要这么做。
知识点: 在使用 IB 设置约束之后, 注意看相对的是 superview 还是 topLayoutGuide/ bottomLayoutGuide, 包括在 Xcode 9 中勾选了 Use Safe Area Layout Guide 之后 ,默认应该是相对于 safeArea 了。